![]()
Before realising this project, you must read the previous 10$ air laser simple project: no special gas, no chemical products, no vacuum and no glass work! then the adjustable sealed air laser.
Main difference between powerful air sealed laser and the adjustable sealed air laser is, of course, size : about 400mm instead 160 but there are also some other tricks: the electrode distance adjustement has been simplified and spark gap has been installed inside the laser cavity itself, essentially to decrease noise (spark gap noise decrease with gas pressure) (I think noise is the biggest problem with N2/air laser: special gas has been suppressed, glass work suppressed, even mirrors can be suppressed, then I must suppress noise and then, perhaps later the high tension itself ;-)
The laser use L aluminium rules electrodes in a symmetrical way: |_ _| plasma is created between electrodes. To adjust eletrodes distance, we choose a very simple way: electrodes are attached together with 2 pull springs that act also as self for the Blumlein circuit. 2 screws for each eletrodes allows user to adjust distance, once distance adjusted, a piece of silicon rubber must be put on adjustment screws heads for gasproof.
Another trick for spark gap: a rectangular hole has bee made in one epoxy laser cap: then a piece of PCB (Printed Circuit Board: 1.6mm epoxy plate with a copper film) is installed in the hole and glued with silicon rubber. Such rubber is soft and allows the plate to oscillate, about +-10 degres. The end of the plate, inside laser cavity is the spark gap, the other end, external, is connected to ground and a screw allows to set the angle. Now we can adjust spark gap with gasproof. This sealed adjustable spark gap has also minimum parasitic inductance ncessary for high gas pressure and very low impedance.
Please notice this laser is still modular and the 2 internal L electrodes, push and pull spings can be dissassembled, it's not so difficult, I must, of course, remove top clear plastic plate glued with silicon rubber before.
I also test another way for capacitor: simply use a clear rectangular plastic sheet on which I glue thin alumimium foil (those used for the food): high tension upper and ground on the bottom.
I then put the laser cavity on the foil to make electrical contact. Then I can roll the plastic foil in such a way the long sides are in contact together. That make a more little laser and, once done, about all high tension parts are protected. the aspect is a little bit strange but it is efficient.
As in the adjustable sealed air laser, there are push springs to ensure electrical contact between laser cavity and L electrodes.
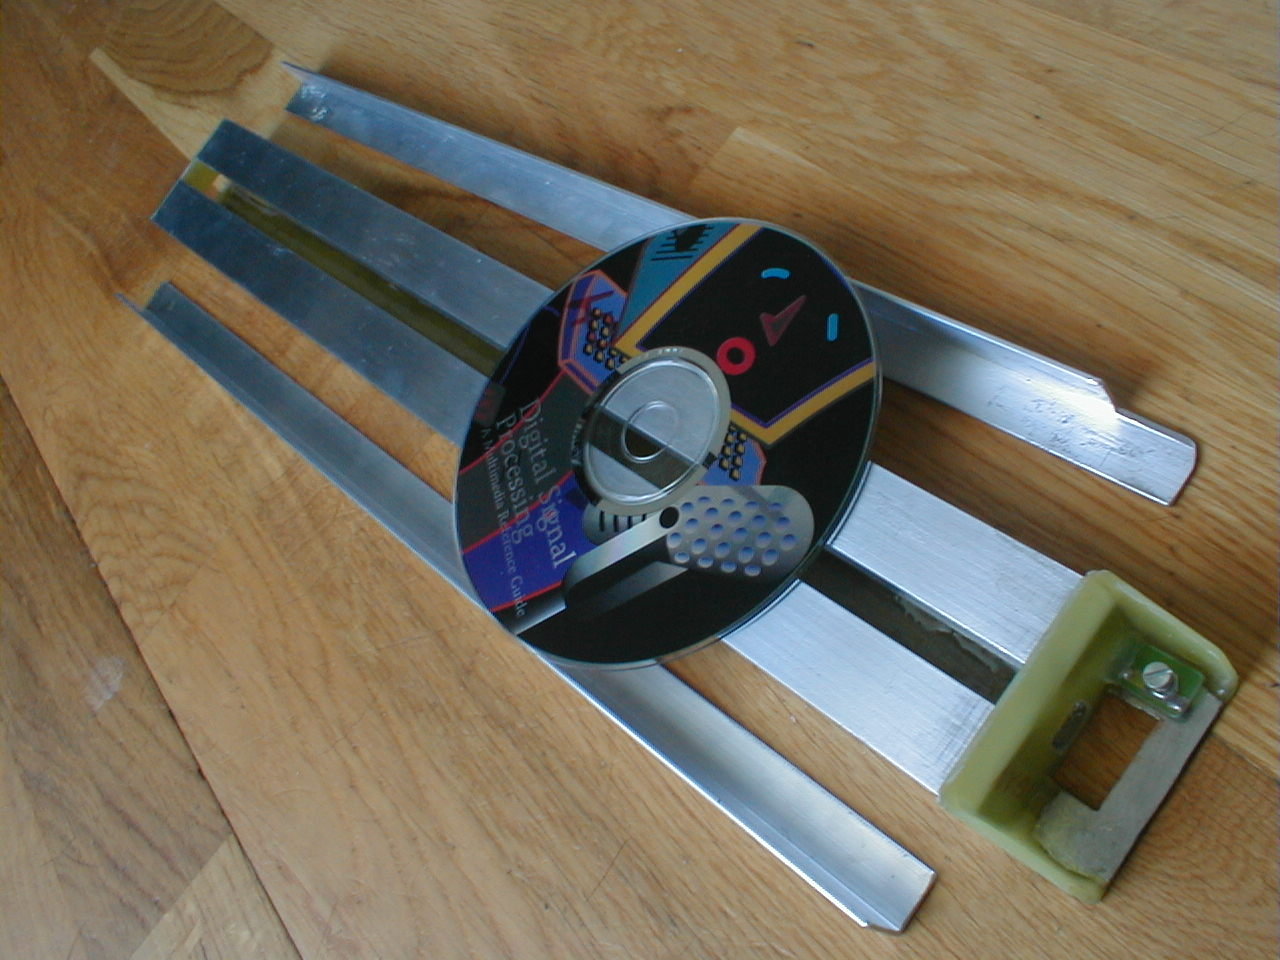
Picture shows elements for this structure (CD-ROM is just for scale): from left to right: bottom PCB plate, U rules box glued to PCB plates, L electrodes, pull and push springs, clear plastic top. (Microscope slides are missing)

We then make preliminary high-tension tests with open air at atmospheric pressure (before gluing top bottom and slides)
A faucet is glued in a hole made on the clear plastic top, some accessories are added to help electrodes adjustment. A pressure meter and a fridge pump are added and it's ready for low pressure or non-air gas test.
I never try all this lasers with Nitrogen gas (flowing or not) that could be interessant to see. But unfortunately, here, in France, get Nitrogen isn't easy for amateurs.
http://spt06.chez-alice.fr/00/lasers.htm
Any comments?
E-mail : 
03/06/05.